TV HAT and Plex Media Server
Contents
Introduction
This guide details how to use your Raspberry Pi with the TV HAT as a TV tuner for Plex Media Server. Together this allows you to watch live TV using the Plex app on any smart TV, smart phone, PC, laptop, tablet, Roku, PlayStation, Xbox etc.

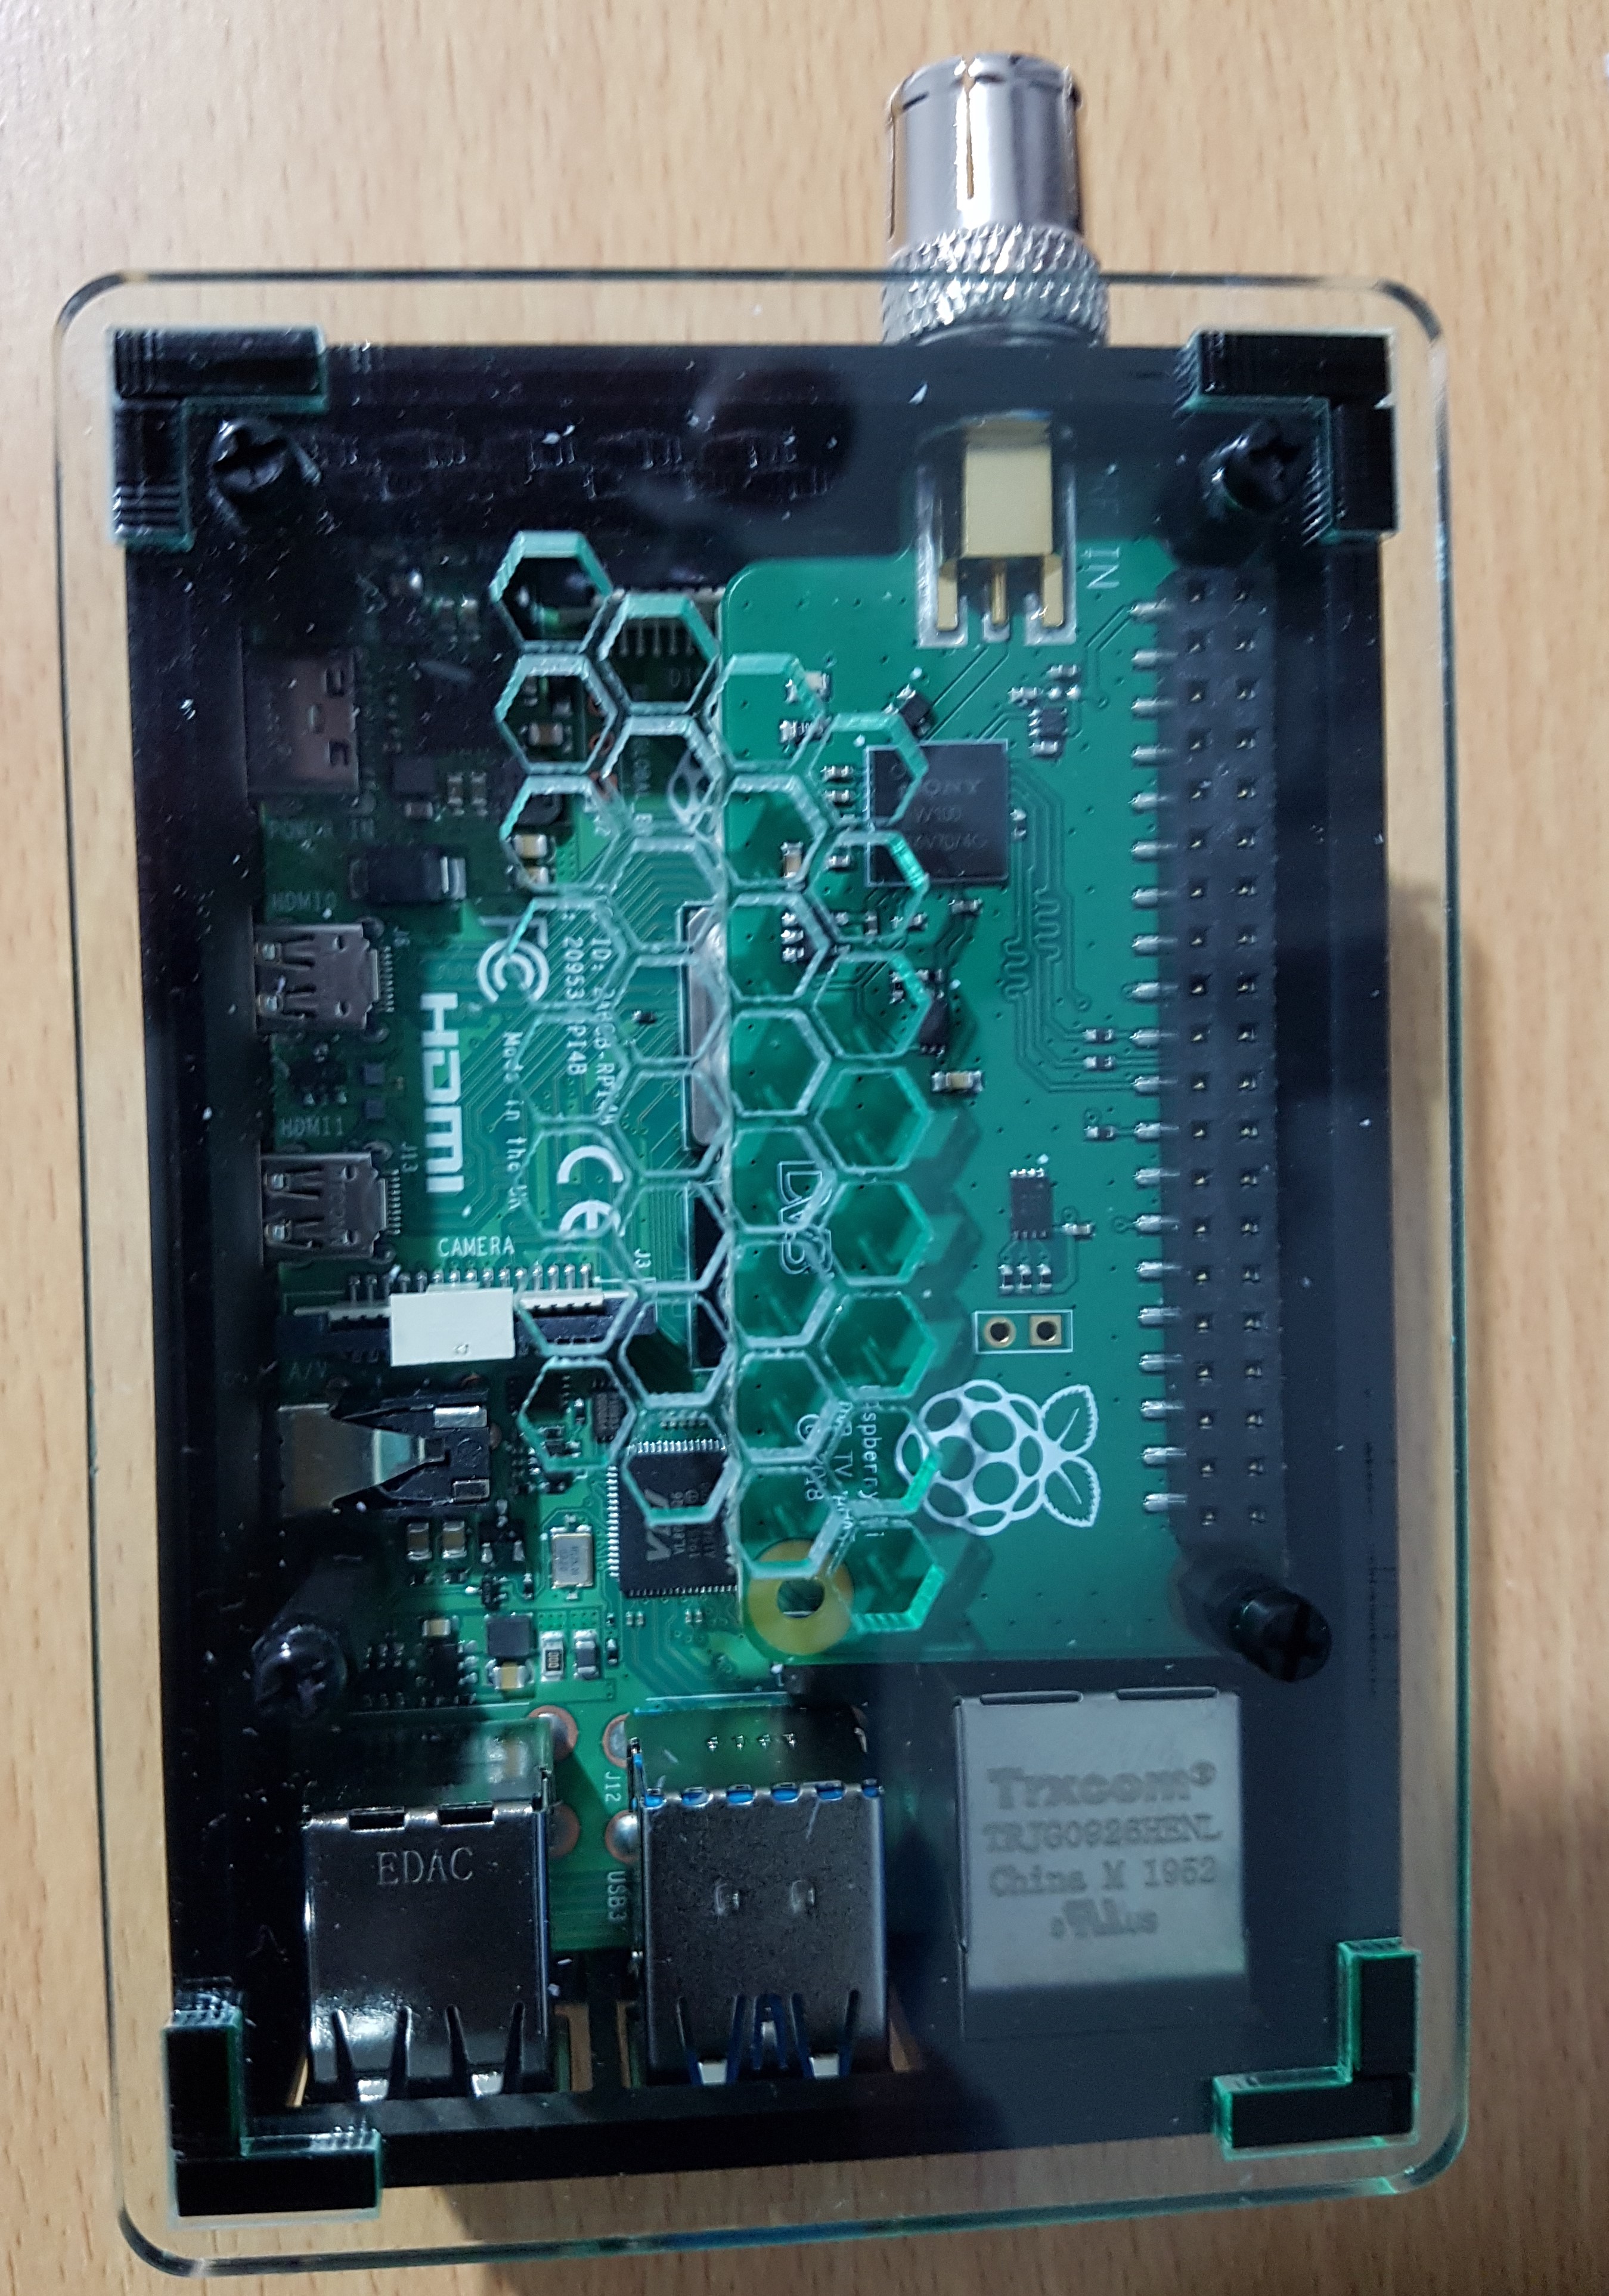
The images above show the TV HAT connected to a Raspberry Pi 4 and also when installed inside the the Pit Hut’s case which has been specially designed to accommodate the TV HAT and either a Raspberry Pi 3 or 4.
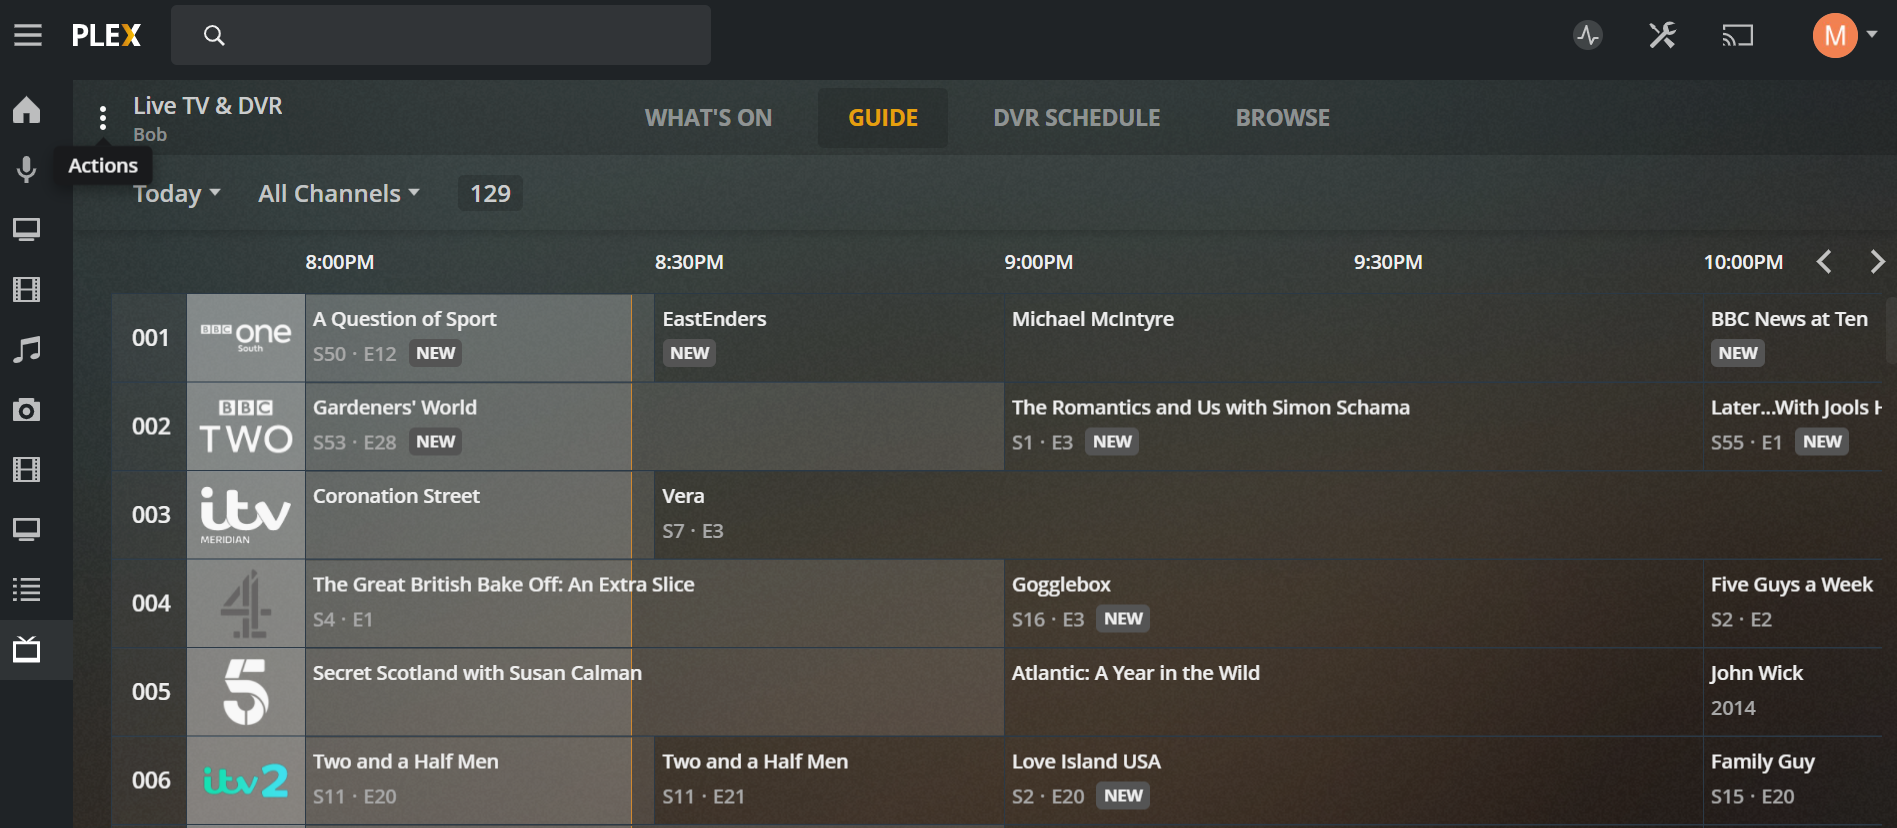
Using Plex’s TV DVR feature means that you can watch live TV as well as schedule recordings remotely and stream them to your devices either within your home or whilst you are out and about.
You can either run Plex Media Server directly on your Raspberry Pi or on a separate computer.
For this guide a Plex Media Server has already been set-up on a CentOS server.
We will be using tvheadend to give access to the TV channels and EPG over the network. In order for Plex to work with tvheadend we will be using a fork of tvhProxy.
Requirements
- A Raspberry Pi 2, 3 or 4 running Arch Linux
- A TV HAT - only £8.50 on Amazon
- An aerial capable of receiving digital TV
- Network connection (WiFi or Ethernet) for your Raspberry Pi
- A static IP or local DNS entry for your Raspberry Pi
- A server to run Plex Media Server or you can run it on the Raspberry Pi itself (this is not covered by this guide)
- A Plex Pass - this is required to use Plex’s TV DVR feature.
- sudo access for a non-root user (required by
makepkg)
Note
It is assumed that your already have Plex up and running either on your Raspberry Pi or on a separate server.
Install development tools
If you haven’t installed Arch Linux, see Arch Linux Installation.
Install the following packages via pacman:
pacman -S autoconf automake cmake fakeroot flex git gcc make patch pkg-config
Install yay
Within the Arch Linux AUR is the tvheadend package package. We can use yay to automate building of packages from the AUR.
As a non-root user clone the yay git repository from the AUR and install:
git clone https://aur.archlinux.org/yay-git.git
cd yay-git
makepkg -si
Install tvheadend
Now use the yay command as a non-root user to build tvheadend from the AUR and any dependencies:
yay tvheadend
Once installed you can start and enable tvheadend:
systemctl start tvheadend
systemctl enable tvheadend
From a web browser on your desktop you should now be able to load the tvheadend web based GUI by browsing to http://your_rpi:9981 where your_rpi is either the IP address or DNS name of your Raspberry Pi.
Once loaded you should be prompted to create an admin account and a normal user account. Set a the admin account details as you see fit and create a normal user account called plex with a password. We will use this later with tvhProxy.
Note
Plex requires web access to tvheadend in order to load the channels, EPG etc.
The wizard should then ask you for information about your TV reception in your area. You need to select country and name of your local transmitter. This allows tvheadend to work out which channels etc. you should have.
Finally you can then perform a channel scan. Leave this running until it has completed.
Install tvhProxy
The original version of tvhProxy has been archived on GitHub by its maintainer and is out of date and does not work with recent versions of Plex Media Server. Luckily chkuendig has created a fork which is being maintained at the time of writing (September 2020).
I have create a PKGBUILD for this fork and it can be installed on your Raspberry Pi like so:
git clone https://github.com/neilmunday/pkg-tvhproxy-git
cd pkg-tvhproxy-git
makepkg -si
Now edit /etc/conf.d/tvhproxy and set the following:
TVH_BINDADDR=''
TVH_URL='http://plex:plex@your_rpi:9981'
TVH_PROXY_URL='http://your_rpi'
TVH_TUNER_COUNT=1
TVH_WEIGHT=300
TVH_CHUNK_SIZE=1048576
TVH_PROFILE='pass'
As before, change your_rpi above to either your Raspberry Pi’s IP address or DNS name.
Now start and enable tvhProxy:
systemctl start tvhproxy
systemctl enable tvhproxy
Configure Plex Media Server
Log into your Plex Media Server and go to settings. Here you should find under the Manage sub menu Live TV & DVR. Click Add Device and your Raspberry Pi tuner should appear thanks to tvhProxy.
Once added, Plex will create the TV guide for you - this will take a few minutes after which you can watch live TV, create recordings etc.